Guide to building Spring Boot library
In this article, I’m going to show you how to create and share your own custom Spring Boot library. If you decide to build such a product you should follow some best practices recommended by Spring Team. It’s a little bit more complicated than creating a plain Java library. Finally, you should publish your artifacts somewhere to share it with the community. Probably you need to obtain positive feedback from the community, so you should think about adding some extras. I’m also going to describe them. Let’s begin!
Examples
If you are looking for the examples of simple Spring Boot libraries you can take a look on my repositories: https://github.com/piomin/spring-boot-logging and https://github.com/piomin/spring-boot-istio.
1. Pick the right name
We should pick the right name for our library. Spring recommends creating special modules called “starters” that contain code with auto-configuration and customize the infrastructure of a given technology. The name of the third-party starter should end with spring-boot-starter and start with the name of the project or something related to the technology we are using in the library. It is contrary to the names of all official starters, which are created following the pattern spring-boot-starter-*. For example, the names of my libraries are logstash-logging-spring-boot-starter or istio-spring-boot-starter.
2. Create auto-configuration
Typically the “starter” module is separated from the “autoconfigure” module. However, it is not required. The autoconfigure module contains everything necessary for a start. Moreover, if I’m creating a simple library that does not consist of many classes, I’m inserting everything into a single starter module. Of course, that is my approach. You can still create a separate starter module that includes the required dependencies for the project. It is the most important that all the beans are registered inside the auto-configuration class. Do not annotate each of your beans inside a library with @Component or @Service, but define them in an auto-configured module. Here’s a simple auto-configuration class inside my logstash-logging-spring-boot-starter library.
@Configuration
@ConfigurationProperties(prefix = "logging.logstash")
public class SpringLoggingAutoConfiguration {

   private static final String LOGSTASH_APPENDER_NAME = "LOGSTASH";
   private String url = "localhost:8500";
   private String ignorePatterns;
   private boolean logHeaders;
   private String trustStoreLocation;
   private String trustStorePassword;

   @Value("${spring.application.name:-}")
   String name;

   @Autowired(required = false)
   Optional<RestTemplate> template;

   @Bean
   public UniqueIDGenerator generator() {
      return new UniqueIDGenerator();
   }

   @Bean
   public SpringLoggingFilter loggingFilter() {
      return new SpringLoggingFilter(generator(), ignorePatterns, logHeaders);
   }

   @Bean
   @ConditionalOnMissingBean(RestTemplate.class)
   public RestTemplate restTemplate() {
      RestTemplate restTemplate = new RestTemplate();
      List<ClientHttpRequestInterceptor> interceptorList = new ArrayList<ClientHttpRequestInterceptor>();
      interceptorList.add(new RestTemplateSetHeaderInterceptor());
      restTemplate.setInterceptors(interceptorList);
      return restTemplate;
   }

   @Bean
   @ConditionalOnProperty("logging.logstash.enabled")
   public LogstashTcpSocketAppender logstashAppender() {
      LoggerContext loggerContext = (LoggerContext) LoggerFactory.getILoggerFactory();
      LogstashTcpSocketAppender logstashTcpSocketAppender = new LogstashTcpSocketAppender();
      logstashTcpSocketAppender.setName(LOGSTASH_APPENDER_NAME);
      logstashTcpSocketAppender.setContext(loggerContext);
      logstashTcpSocketAppender.addDestination(url);
      if (trustStoreLocation != null) {
         SSLConfiguration sslConfiguration = new SSLConfiguration();
         KeyStoreFactoryBean factory = new KeyStoreFactoryBean();
         factory.setLocation(trustStoreLocation);
         if (trustStorePassword != null)
            factory.setPassword(trustStorePassword);
         sslConfiguration.setTrustStore(factory);
         logstashTcpSocketAppender.setSsl(sslConfiguration);
      }
      LogstashEncoder encoder = new LogstashEncoder();
      encoder.setContext(loggerContext);
      encoder.setIncludeContext(true);
      encoder.setCustomFields("{\"appname\":\"" + name + "\"}");
      encoder.start();
      logstashTcpSocketAppender.setEncoder(encoder);
      logstashTcpSocketAppender.start();
      loggerContext.getLogger(Logger.ROOT_LOGGER_NAME).addAppender(logstashTcpSocketAppender);
      return logstashTcpSocketAppender;
   }
}
To enable auto-configuration for the custom library we need to create file spring.factories in /src/main/resources/META-INF directory that contains a list of auto-configuration classes.
org.springframework.boot.autoconfigure.EnableAutoConfiguration=\
pl.piomin.logging.config.SpringLoggingAutoConfiguration
3. Process annotations
Spring is an annotation-based framework. If you are creating your custom library you will usually define some annotations used to enable or disable features. With Spring Boot you can easily process such annotations. Here’s my custom annotation used to enable the Istio client on application startup. I’m following the Spring pattern widely used in Spring Cloud.
@Target({ElementType.TYPE})
@Retention(RetentionPolicy.RUNTIME)
@Documented
public @interface EnableIstio {
    int timeout() default 0;
    String version() default "";
    int weight() default 0;
    int numberOfRetries() default 0;
    int circuitBreakerErrors() default 0;
}
I need to process already defined annotation only once on startup. That’s why I’m creating a bean that implements the ApplicationListener interface to catch ContextRefreshedEvent emitted by Spring Boot.
public class ApplicationStartupListener implements
      ApplicationListener<ContextRefreshedEvent> {
   private ApplicationContext context;
   private EnableIstioAnnotationProcessor processor;
   public ApplicationStartupListener(ApplicationContext context,
         EnableIstioAnnotationProcessor processor) {
      this.context = context;
      this.processor = processor;
   }
   @Override
   public void onApplicationEvent(ContextRefreshedEvent contextRefreshedEvent) {
      Optional<EnableIstio> annotation =
            context.getBeansWithAnnotation(EnableIstio.class).keySet().stream()
            .map(key -> context.findAnnotationOnBean(key, EnableIstio.class))
            .findFirst();
      annotation.ifPresent(enableIstio -> processor.process(enableIstio));
   }
}
4. Spring Boot library dependencies
Our library should reference only those artifacts or other starters, that are necessary for implementation. Here’s a minimal set of artifacts required for my istio-spring-boot-starter. Besides Spring and Spring Boot libraries I only use Kubernetes and Istio Java clients. We might as well declare a reference to spring-boot-starter-parent.
<dependencies>
   <dependency>
      <groupId>me.snowdrop</groupId>
      <artifactId>istio-client</artifactId>
      <version>${istio-client.version}</version>
   </dependency>
   <dependency>
      <groupId>io.fabric8</groupId>
      <artifactId>kubernetes-client</artifactId>
      <version>${kubernetes-client.version}</version>
   </dependency>
   <dependency>
      <groupId>org.springframework</groupId>
      <artifactId>spring-context-support</artifactId>
      <version>${spring.version}</version>
      <scope>provided</scope>
   </dependency>
   <dependency>
      <groupId>org.springframework.boot</groupId>
      <artifactId>spring-boot-autoconfigure</artifactId>
      <version>${spring.boot.version}</version>
      <scope>provided</scope>
   </dependency>
</dependencies>
5. Publish
Typically the implementation process of the Spring Boot library is divided into two phases. In the first phase, we need to implement the specific mechanisms related to our library. In the second phase, we should take care of following the Spring Boot best practices. Assuming we have already finished it, we may publish our custom starter to share it with the community. In my opinion, the best way to do it is by publishing it on the Maven Central repository.
You must go through several steps to publish JAR files to Maven Central. The list of necessary steps is listed below. For the more detailed description, you may refer to the article How to Publish Your Artifacts to Maven Central on DZone.
Here’s the list of prerequisites:
- Create an account at Sonatype (https://oss.sonatype.org/)
- Claim your product’s namespace by creating an issue in Sonatype’s Jira
- Generate PGP private/public key pair to sign your JAR files
- Publish your key to a public key server to one of GPG servers
After completing all the required steps you may proceed to a configuration in Maven POM file. You need to include there two sets of configurations. The first of them contains a piece of the necessary information about our project, author, and source code repository.
<name>logstash-logging-spring-boot-starter</name>
<description>Library for HTTP logging with Spring Boot</description>
<url>https://github.com/piomin/spring-boot-logging</url>
<developers>
   <developer>
      <name>Piotr Mińkowski</name>
      <email>piotr.minkowski@gmail.com</email>
      <url>https://github.com/piomin</url>
   </developer>
</developers>
<licenses>
   <license>
      <name>MIT License</name>
      <url>http://www.opensource.org/licenses/mit-license.php</url>
      <distribution>repo</distribution>
   </license>
</licenses>
<scm>
   <connection>scm:git:git://github.com/piomin/spring-boot-logging.git</connection>
   <developerConnection>scm:git:git@github.com:piomin/spring-boot-logging.git</developerConnection>
   <url>https://github.com/piomin/spring-boot-logging</url>
</scm>
<distributionManagement>
   <snapshotRepository>
      <id>ossrh</id>
      <url>https://oss.sonatype.org/content/repositories/snapshots</url>
   </snapshotRepository>
   <repository>
      <id>ossrh</id>
      <url>https://oss.sonatype.org/service/local/staging/deploy/maven2/</url>
   </repository>
</distributionManagement>
In the second step, we need to add some Maven plugins for signing JAR file, including source code files and Javadocs there. Here’s a required list of plugins activated only with release Maven profile enabled.
profiles>
   <profile>
      <id>release</id>
      <build>
         <plugins>
            <plugin>
               <groupId>org.apache.maven.plugins</groupId>
               <artifactId>maven-gpg-plugin</artifactId>
               <version>1.6</version>
               <executions>
                  <execution>
                     <id>sign-artifacts</id>
                     <phase>verify</phase>
                     <goals>
                        <goal>sign</goal>
                     </goals>
                  </execution>
               </executions>
            </plugin>
            <plugin>
               <groupId>org.apache.maven.plugins</groupId>
               <artifactId>maven-source-plugin</artifactId>
               <version>3.2.1</version>
               <executions>
                  <execution>
                     <id>attach-sources</id>
                     <goals>
                        <goal>jar-no-fork</goal>
                     </goals>
                  </execution>
               </executions>
            </plugin>
            <plugin>
               <groupId>org.apache.maven.plugins</groupId>
               <artifactId>maven-javadoc-plugin</artifactId>
               <version>3.2.0</version>
               <executions>
                  <execution>
                     <id>attach-javadocs</id>
                     <goals>
                        <goal>jar</goal>
                     </goals>
                  </execution>
               </executions>
            </plugin>
         </plugins>
      </build>
   </profile>
</profiles>
Finally you need to execute command mvn clean deploy -P release, and visit Sonatype site to confirm publication of your library.

6. Promote your Spring Boot library
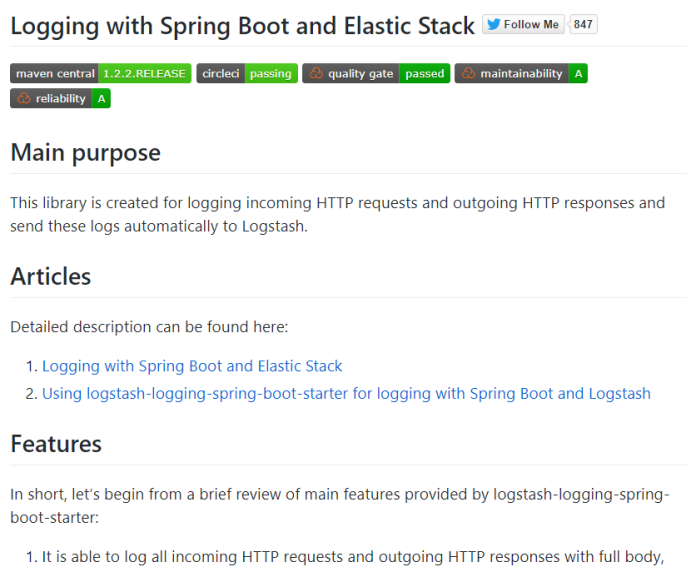
Congratulations! You have already published your first Spring Boot library. But, the question is what’s next? You probably would like to encourage people to try it. Of course, you can advertise it on social media, or create articles on dev portals. But my first advice is to take care of the presentation site. If you are storing your source code on GitHub prepare a Readme file with a detailed description of your library. It is also worth adding some tags that describe your project.
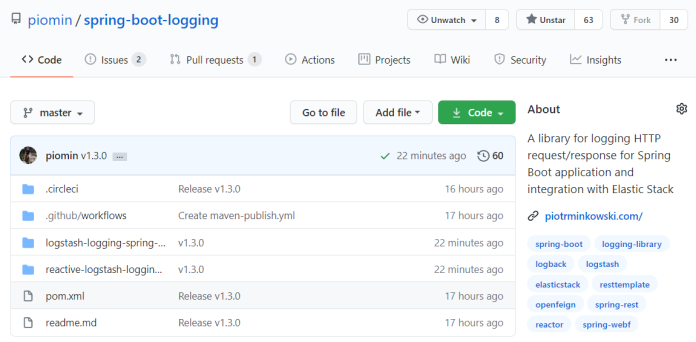
It is relatively easy to integrate your GitHub repository with some third-party tools used for continuous integration or static source code analysis. Thanks to that you can continuously improve your library. Moreover, you can add some badges to your repository that indicate you are using such tools. In my repositories spring-boot-logging and spring-boot-istio, I have already added badges with Maven release, CircleCI builds status and SonarCloud analysis reports. Looks fine? 🙂
Conclusion
In this article, I describe the process of creating a Spring Boot library from the beginning to the end. You can take a look on my libraries https://github.com/piomin/spring-boot-logging and https://github.com/piomin/spring-boot-istio if you are looking for simple examples. Of course, there are many other third-party Spring Boot starters published on GitHub you can also take a look. If you interested in building your own Spring Boot library you should learn more about auto-configuration: A Magic Around Spring Boot Auto Configuration.


Related Posts