Development on Kubernetes: Choose a platform

An important step before you begin the implementation of microservices is to choose the Kubernetes cluster for development. In this article, I’m going to describe several available solutions.
You can find a video version of every part of this tutorial on my YouTube channel. The second part is available here: Microservices on Kubernetes: Part 2 – Cluster setup
The first important question is if I should prefer a local single-node instance or maybe deploy my applications directly on a remote cluster. Sometimes an installation of the local Kubernetes cluster for development may be troublesome, especially if you use Windows OS. You also need to have sufficient RAM or CPU resources on your machine. On the other hand, communication with a remote platform can take more time, and such a managed Kubernetes cluster may not be free.
This article is the second part of my guide, where I’ll be showing you tools, frameworks, and platforms that speed up the development of JVM microservices on Kubernetes. We are going to implement sample microservices-based architectures using Kotlin and then deploy and run them on different Kubernetes clusters.
The previous part of my guide is available here: Development on Kubernetes: IDE & Tools
Minikube
Minikube runs a single-node Kubernetes cluster for development inside a VM on your local machine. It supports VM drivers like VirtualBox, HyperV, KVM2. Since Minikube is relatively a mature solution in the Kubernetes world, the list of supported features is pretty impressive. These features are LoadBalancer, Multi-cluster, NodePorts, Persistent Volumes, Ingress, Dashboard, or Container runtimes.
All you need is Docker (or similarly compatible) container or a Virtual Machine environment, and Kubernetes may be started using a single command: minikube start. The minimal requirements are 2 CPUs, 2GB of free memory, and 20GB of free disk space.
Something especially useful during development is the ability to install addons. For example, we may easily enable the whole EFK stack with predefined configuration using a single command.
$ minikube addons enable efk
Kubernetes on Docker Desktop
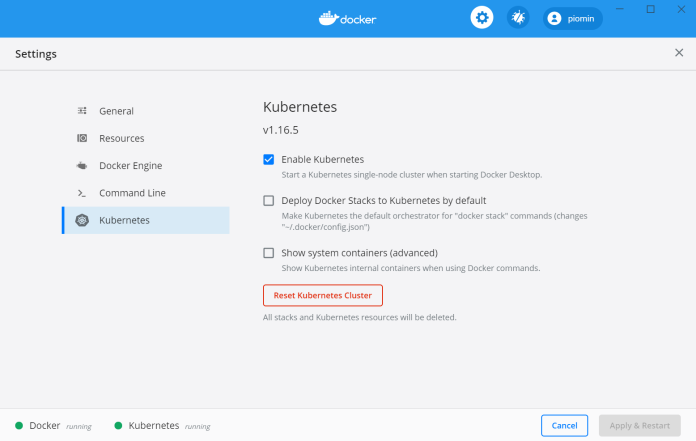
Kubernetes on Docker Desktop is an interesting alternative to Minikube for running cluster on your local machine. Docker Desktop includes a standalone Kubernetes server and client, as well as Docker CLI integration. The Kubernetes server runs locally within your Docker instance, is not configurable, and is a single-node cluster.
Unfortunately, it is not available for all Windows users. You need Windows Windows 10 64-bit: Pro, Enterprise, or Education. For Windows 10 Home you first need to enable the WSL 2 feature. We also need to have 4GB of RAM, Hyper-V, and Containers Windows features enabled. In return, you have both Docker and Kubernetes in a single tool and UI dashboard, where you may change the configuration or perform some basic troubleshooting.
Kubernetes in Docker (kind)
kind is a tool for running local Kubernetes clusters using Docker container “nodes”. It supports multi-node clusters including HA, and may be installed on Linux, macOS, and Windows. Creating a cluster is very similar to minikube’s approach – we need to execute command kind create cluster. Since it does not use VM, but moves the cluster into Docker containers, it leads to a significantly faster startup speed than Minikube or Kubernetes on Docker Desktop. That’s why it may be an interesting option during local development.
Civo
Civo seems to be an interesting alternative to other Kubernetes hosted platforms. Since it is based on a lightweight version of Kubernetes called k3s, a new cluster can be created much faster than on other platforms. For me, it took less than 2 minutes for the 3-nodes managed cluster. The other good news is that you may be a beta tester of that product where you receive a free credit 70$ monthly. Of course, Civo is a relatively new solution not free from errors and shortcomings.
We can download Civo CLI to interact with our cluster. We can easily install there a popular software like Postgresql, MongoDB, Redis, or cloud-native edge router Traefik.
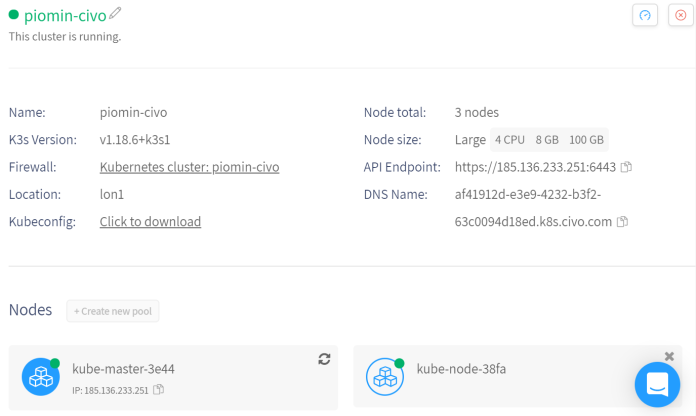
To interact with Civo using their CLI we first need to copy the API key, that is available in section “Security”. Then you should execute the following CLI commands. After that, you can use the Civo cluster with kubectl. Since creating a new cluster takes only 2 minutes you can remove it after your development is finished and create a new one on demand.
$ civo apikey add piomin-civo-newkey
$ civo apikey current piomin-civo-newkey
$ civo k3s config piomin-civo --merge
Google Kubernetes Engine
Google Kubernetes Engine is probably your first choice for a remote cluster. Not only that Kubernetes is associated with Google. It offers the best free trial plan including 300$ credit for 12 months. You can choose between many products that can be installed on your cluster in one click. If you are running Kubernetes cluster for development with default settings (3 nodes with total capacity 6vCPU and 12GB of RAM) on-demand a free credit would be enough for the whole year.
With Google Cloud Console you can manage your cluster easily.
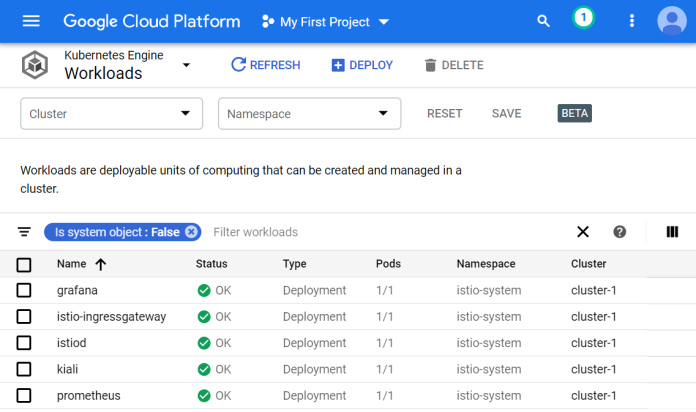
There are also some disadvantages. It takes relatively much time to create a new cluster. But the good news is that we can scale down the existing cluster to 0 using Node Pool, and scale it up if needed. Such an operation is much faster.
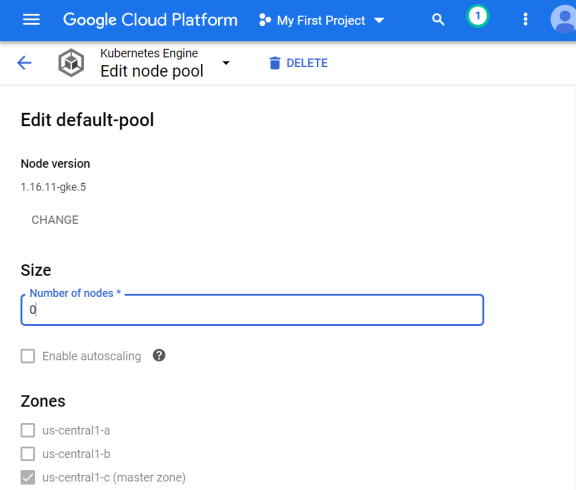
Another disadvantage is the lack of the latest versions of the software. For example, it is possible to install version 1.16 of Kubernetes or Istio 1.4 when using predefined templates (of course you can install Istio manually using the latest version 1.6). If you are looking for a guide to deploying JVM-based application on GKE you may refer to my article Running Kotlin Microservice on Google Kubernetes Engine.
Digital Ocean
Digital Ocean is advertised as being designed for developers. It allows you to spin up a managed Kubernetes cluster for development in just a few clicks. For me, it took around 7 minutes to create a 3-nodes cluster there. The estimated cost of such a plan is 60$ per month. You are getting 100$ free credit for two months in the beginning.
You can scale it down to a single node or destroy the whole cluster and create a new one on demand. It is also possible to use some predefined templates to install additional products like Linkerd, NGINX Ingress Controller, Jeager, or even Okteto platform in one click. By default, the total cluster capacity is 6vCPU, 12GB of RAM, and 240GB of disk space.
A pricing plan on the Digital Ocean is pretty clear. You are paying just for running worker nodes. For standard node (2vCPU, 4GB RAM) it is 0.03$/hour. So if you would use such a cluster for development needs and destroy it after every usage the total monthly cost shouldn’t be large. It comes with a preinstalled Kubernetes Dashboard as shown below.
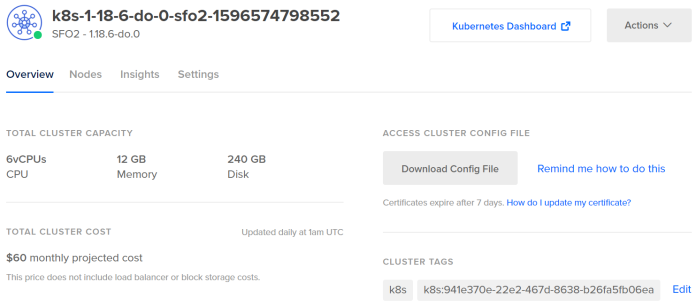
Something that can make it stand out is a possibility to install version 1.18 of Kubernetes. For example, on Google Cloud or Amazon Web Services, we may currently install version 1.16. However, when comparing with GKE it offers a much shorter trial period and smaller free credit.
Okteto
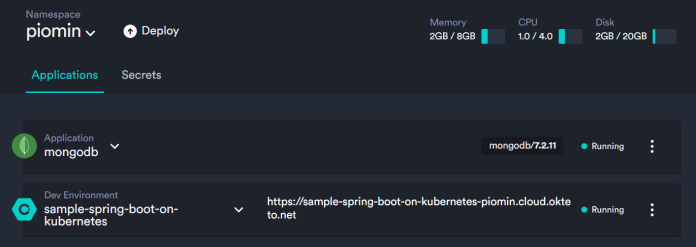
I have already written about Okteto in one of my previous articles Development on Kubernetes with Okteto and Spring Boot. I described there a process of local development and running Spring Boot application on a remote cluster. The main idea behind Okteto is “Code locally with the tools you know and love. Run and debug directly in Okteto Cloud.”. With this development platform you do not have a whole Kubernetes cluster available, but only a single namespace, where you can deploy your applications.
Their current offer for developers is pretty attractive. In a free plan, you get a single namespace, 4vCPU, 8GB of memory, and 5GB of disk space. All applications are shutting down after 24 hours of inactivity. You can also buy a Developer Pro Plan, which offers 2 namespaces and never sleeps for 20$/month.
With Okteto you can easily deploy popular databases and message brokers like MongoDB, Postgresql, Redis, or RabbitMQ in one click. You may also integrate your application with such software by defining Okteto manifest in the root directory of your project.
Conclusion
I’m using most of these solutions. Which of them is chosen depends on the use case. For example, if I need to set up a predefined EFK stack quickly I can do it easily on Minikube. Otherwise, if my application is connecting with some third-party solutions like RabbitMQ, or databases (MongoDB, Postgresql) I can easily deploy such an environment on Okteto or Civo. In a standard situation, I’m using Kubernetes on Docker Desktop, which automatically starts as a service on Windows.
5 COMMENTS