Secure Spring Cloud Microservices with Vault and Nomad

One of the significant topics related to microservices security is managing and protecting sensitive data like tokens, passwords or certificates used by your application. As a developer you probably often implement a software that connects with external databases, message brokers or just the other applications. How do you store the credentials used by your application? To be honest, most of the software code I have seen in my life just stored sensitive data as a plain text in the configuration files. Thanks to that, I could always be able to retrieve the credentials to every database I needed at a given time just by looking at the application source code. Of course, we can always encrypt sensitive data, but if we work with many microservices having separate databases I may not be a very comfortable solution.
Today I’m going to show you how to integrate your Spring Boot application with HashiCorp’s Vault in order to store your sensitive data properly. The first good news is that you don’t have to create any keys or certificates for encryption and decryption, because Vault will do it in your place. In this article in a few areas I’ll refer to my previous article about HashiCorp’s solutions Deploying Spring Cloud Microservices on HashiCorp’s Nomad. Now, as then, I also deploy my sample applications on Nomad to take advantage of built-in integration between those two very interesting HashiCorp’s tools. We will also use another HashiCorp’s solution for service discovery in inter-service communication – Consul. It’s also worth mentioning that Spring Cloud provides a dedicated project for integration with Vault – Spring Cloud Vault.
Architecture
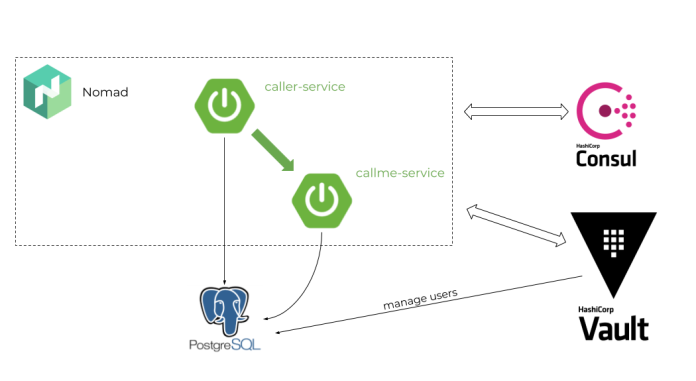
The sample presented in this article will consist of two applications deployed on HashiCorp’s Nomad callme-service and caller-service. Microservice caller-service is the endpoint exposed by callme-service. An inter-service communication is performed using the name of the target application registered in Consul server. Microservice callme-service will store the history of all interactions triggered by caller-service in the database. The credentials to the database are stored on Vault. Nomad is integrated with Vault and stores the root token, which is not visible by the applications. The architecture of the described solution is visible on the following picture.
The current sample is pretty similar to the sample presented in my article Deploying Spring Cloud Microservices on Hashicorp’s Nomad. It is also available in the same repository on GitHub sample-nomad-java-service, but in the different branch vault. The current sample add an integration with PostgreSQL and Vault server for managing credentials to database.
1. Running Vault
We will run Vault inside the Docker container in a development mode. Server in development mode does not require any further setup, it is ready to use just after startup. It provides in-memory encrypted storage and unsecure (HTTP) connection, which is not a problem for a demo purposes. We can override default server IP address and listening port by setting environment property VAULT_DEV_LISTEN_ADDRESS, but we won’t do that. After startup our instance of Vault is available on port 8200. We can use the admin web console, which is for me available under address http://192.168.99.100:8200. The current version of Vault is 1.0.0.
$ docker run --cap-add=IPC_LOCK -d --name vault -p 8200:8200 vault
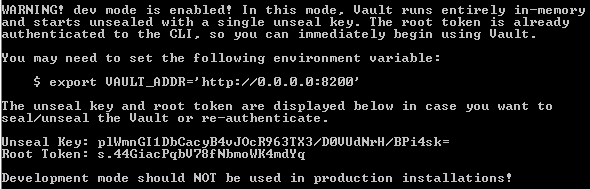
It is possible to login using different methods, but the most suitable way for us is through a token. To do that we have to display container logs using command docker logs vault, and then copy Root Token as shown below.
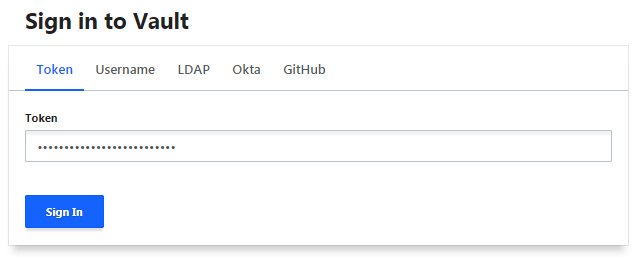
Now you can login to the Vault web console.
2. Integration with Postgres database
In Vault we can create Secret Engine that connects to other services and generates dynamic credentials on demand. Secrets engines are available under path. There is a dedicated engine for the various databases, for example PostgreSQL. Before activating such an engine we should run an instance of Postgres database. This time we will also use a Docker container. It is possible to set login and password to the database using environment variables.
$ docker run -d --name postgres -p 5432:5432 -e POSTGRES_PASSWORD=postgres123456 -e POSTGRES_USER=postgres postgres
After starting the database, we may proceed to the engine configuration in the Vault web console. First, let’s create our first secret engine. We may choose between some different types of engine. The right choice for now is Databases.

You can apply a new configuration to Vault using vault command or by HTTP API. Vault web console provides a terminal for running CLI commands, but it could be problematic in some cases. For example, I have a problem with escaping strings in some SQL commands, and therefore I had to add it using HTTP API. No matter which method you use, the next steps are the same. Following Vault documentation we first need to configure a plugin for PostgreSQL database and then provide connection settings and credentials.
$ vault write database/config/postgres plugin_name=postgresql-database-plugin allowed_roles="default" connection_url="postgresql://{{username}}:{{password}}@192.168.99.100:5432?sslmode=disable" username="postgres" password="postgres123456"
Alternatively, you can perform the same action using the HTTP API method. To authenticate against Vault we need to add header X-Vault-Token with root token. I have disabled SSL for connection with Postgres by setting sslmode=disable. There is only one role allowed to use this plugin: default. Now, let’s configure that role.
$ curl --header "X-Vault-Token: s.44GiacPqbV78fNbmoWK4mdYq" --request POST --data '{"plugin_name": "postgresql-database-plugin","allowed_roles": "default","connection_url": "postgresql://{{username}}:{{password}}@localhost:5432?sslmode=disable","username": "postgres","password": "postgres123456"}' http://192.168.99.100:8200/v1/database/config/postgres
The role can be created either with CLI or with HTTP API. The name of the role should be the same as the name passed in field allowed_roles in the previous step. We also have to set a target database name and SQL statement that creates users with privileges.
$ vault write database/roles/default db_name=postgres creation_statements="CREATE ROLE \"{{name}}\" WITH LOGIN PASSWORD '{{password}}' VALID UNTIL '{{expiration}}';GRANT SELECT, UPDATE, INSERT ON ALL TABLES IN SCHEMA public TO \"{{name}}\";GRANT USAGE, SELECT ON ALL SEQUENCES IN SCHEMA public TO \"{{name}}\";" default_ttl="1h" max_ttl="24h"
Alternatively you can call the following HTTP API endpoint.
$ curl --header "X-Vault-Token: s.44GiacPqbV78fNbmoWK4mdYq" --request POST --data '{"db_name":"postgres", "creation_statements": ["CREATE ROLE \"{{name}}\" WITH LOGIN PASSWORD '{{password}}' VALID UNTIL '{{expiration}}';GRANT SELECT, UPDATE, INSERT ON ALL TABLES IN SCHEMA public TO \"{{name}}\";GRANT USAGE, SELECT ON ALL SEQUENCES IN SCHEMA public TO \"{{name}}\";"]}' http://192.168.99.100:8200/v1/database/roles/default
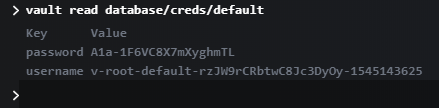
And that’s all. Now, we can test our configuration using command with role’s name vault read database/creds/default as shown below. You can login to the database using returned credentials. By default, they are valid for one hour.
3. Enabling Spring Cloud Vault
We have succesfully configured a secret engine that is responsible for creating users on Postgres. Now, we can proceed to the development and integrate our application with Vault. Fortunately, there is a project Spring Cloud Vault, which provides out-of-the-box integration with Vault database secret engines. The only thing we have to do is to include Spring Cloud Vault to our project and provide some configuration settings. Let’s start from setting Spring Cloud Release Train. We use the newest stable version Finchley.SR2.
<dependencyManagement>
   <dependencies>
      <dependency>
         <groupId>org.springframework.cloud</groupId>
         <artifactId>spring-cloud-dependencies</artifactId>
         <version>Finchley.SR2</version>
         <type>pom</type>
         <scope>import</scope>
      </dependency>
   </dependencies>
</dependencyManagement>
We have to include two dependencies to our pom.xml. Starter spring-cloud-starter-vault-config is responsible for loading configuration from Vault and spring-cloud-vault-config-databases responsible for integration with secret engines for databases.
<dependency>
   <groupId>org.springframework.cloud</groupId>
   <artifactId>spring-cloud-starter-vault-config</artifactId>
</dependency>
<dependency>
   <groupId>org.springframework.cloud</groupId>
   <artifactId>spring-cloud-vault-config-databases</artifactId>
</dependency>
The sample application also connects to Postgres database, so we will include the following dependencies.
<dependency>
   <groupId>org.springframework.boot</groupId>
   <artifactId>spring-boot-starter-data-jpa</artifactId>
</dependency>
<dependency>
   <groupId>org.postgresql</groupId>
   <artifactId>postgresql</artifactId>
   <version>42.2.5</version>
</dependency>
The only thing we have to do is to configure integration with Vault via Spring Cloud Vault. The following configuration settings should be placed in bootstrap.yml (no application.yml). Because we run our application on Nomad server, we use the port number dynamically set by Nomad available under environment property NOMAD_HOST_PORT_http and secret token from Vault available under environment property VAULT_TOKEN.
server:
  port: ${NOMAD_HOST_PORT_http:8091}

spring:
  application:
    name: callme-service
  cloud:
    vault:
      uri: http://192.168.99.100:8200
      token: ${VAULT_TOKEN}
      postgresql:
        enabled: true
        role: default
        backend: database
  datasource:
    url: jdbc:postgresql://192.168.99.100:5432/postgres
The important part of the configuration visible above is under the property spring.cloud.vault.postgresql. Following Spring Cloud documentation “Username and password are stored in spring.datasource.username and spring.datasource.password so using Spring Boot will pick up the generated credentials for your DataSource without further configuration”. Spring Cloud Vault is connecting with Vault, and then using role default (previously created on Vault) to generate new credentials to database. Those credentials are injected into spring.datasource properties. Then, the application is connected to the database using injected credentials. Everything works fine. Now, let’s try to run our applications on Nomad.
4. Deploying apps on Nomad
Before starting Nomad node we should also run Consul using its Docker container. Here’s a Docker command that starts a single node Consul instance.
$ docker run -d --name consul -p 8500:8500 consul
After that we can configure connection settings to Consul and Vault in Nomad configuration. I have created the file nomad.conf. Nomad is authenticating itself against Vault using root token. Connection with Consul is not secured. Sometimes it is also required to set network interface name and total CPU on the machine for the Nomad client. Most clients are able to determine it automatically, but it does not work for me.
client {
  network_interface = "Połączenie lokalne 4"
  cpu_total_compute = 10400
}

consul {
  address = "192.168.99.100:8500"
}

vault {
  enabled = true
  address = "http://192.168.99.100:8200"
  token = "s.6jhQ1WdcYrxpZmpa0RNd0LMw"
}
Let’s run Nomad in development mode passing configuration file location.
$ nomad agent -dev -config=nomad.conf
If everything works fine you should see the similar log on startup.
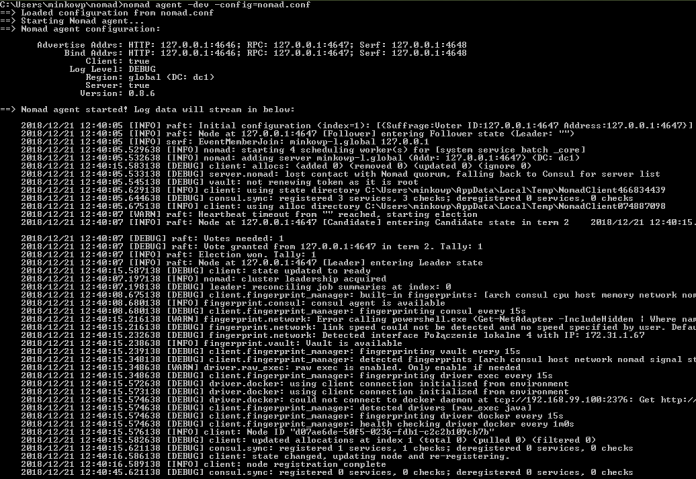
Once we have succesfully started Nomad agent integrated with Consul and Vault, we can proceed to the application deployment. First build the whole project with mvn clean install command. The next step is to prepare Nomad’s job descriptor file. For more details about the Nomad deployment process and its descriptor file you can refer to my previous article about it (mentioned in the preface of this article). Descriptor file is available inside application GitHub under path callme-service/job.nomad for callme-service, and caller-service/job.nomad for caller-service.
job "callme-service" {
   datacenters = ["dc1"]
   type = "service"
   group "callme" {
      count = 2
      task "api" {
         driver = "java"
         config {
            jar_path    = "C:\\Users\\minkowp\\git\\sample-nomad-java-services-idea\\callme-service\\target\\callme-service-1.0.0-SNAPSHOT.jar"
            jvm_options = ["-Xmx256m", "-Xms128m"]
         }
         resources {
            cpu    = 500 # MHz
            memory = 300 # MB
            network {
               port "http" {}
            }
         }
         service {
            name = "callme-service"
            port = "http"
         }
         vault {
            policies = ["nomad"]
         }
      }
      restart {
         attempts = 1
      }
   }
}
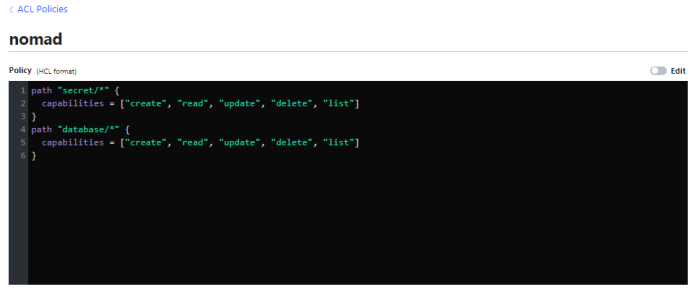
You will have to change the value of jar_path property with your path of application binaries. Before applying this deployment to Nomad we will have to add some additional configuration on Vault. When adding integration with Vault we have to pass the name of policies used for checking permissions. I set the policy with the name nomad, which now has to be created in Vault. Our application requires a permission for reading paths /secret/* and /database/* as shown below.
Finally, we can deploy our application callme-service on Nomad by executing the following command.
$ nomad job run job.nomad
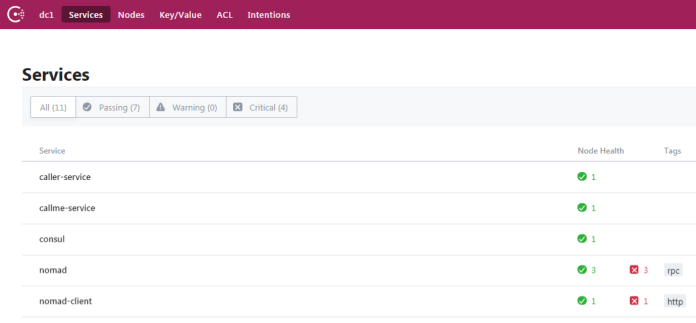
The similar descriptor file is available for caller-service, so we can also deploy it. All the microservice has been registered in Consul as shown below.
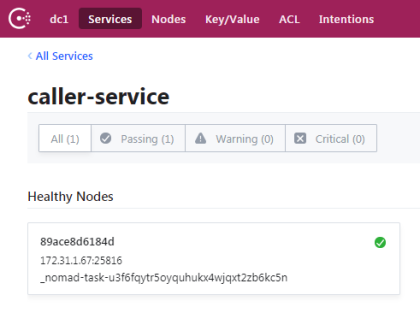
Here is the list of registered instances of caller-service. As you can see on the picture below it is available under port 25816.
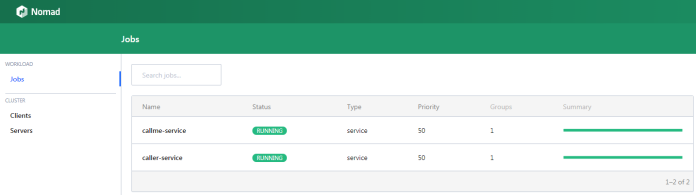
You can also take a look at the Nomad jobs view.


Related Posts